A3 Jetta Timing Belt Change
OK I did my timing belt and took a bunch of pictures I will keep the captions to a minimum and let the picture do the talking.Warning, there are many images, this could take a bit of time to download
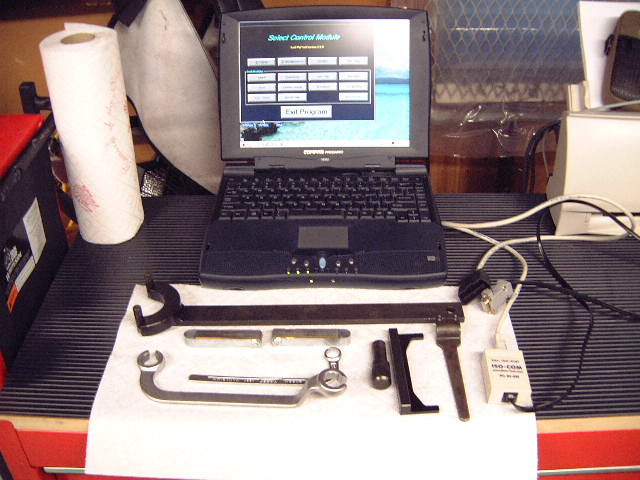
This is a picture of the tools and the computer including the Uwe Ross cable.
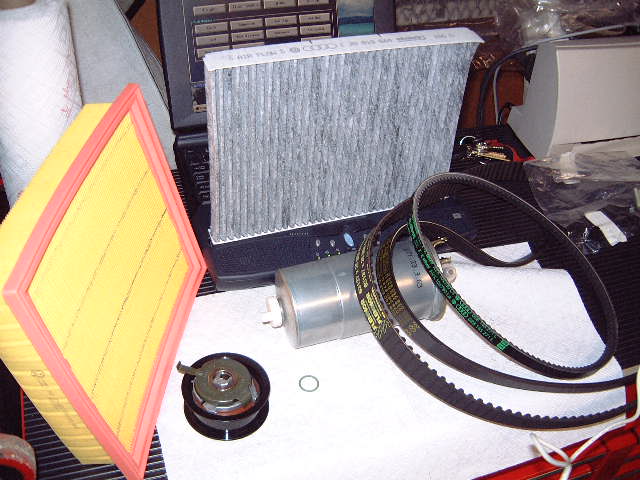
Here is a picture of the parts needed, notice there is a pollen air filter, most A3 TDI's do not have the filter but I installed one due to my wifes allergies.
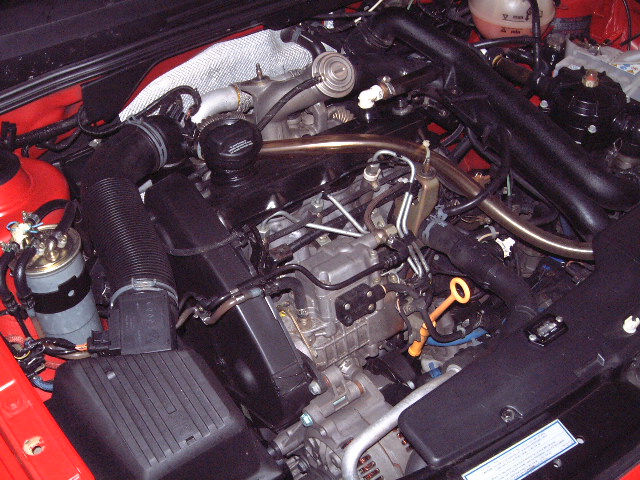
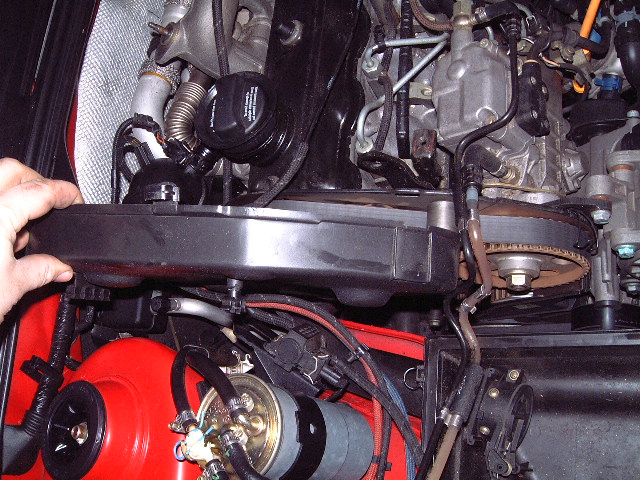
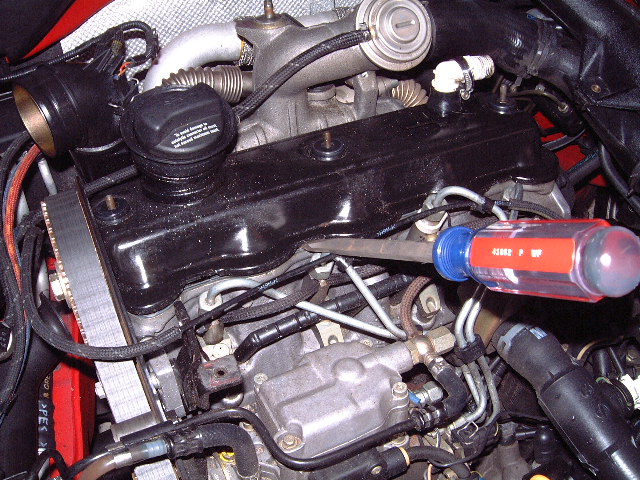
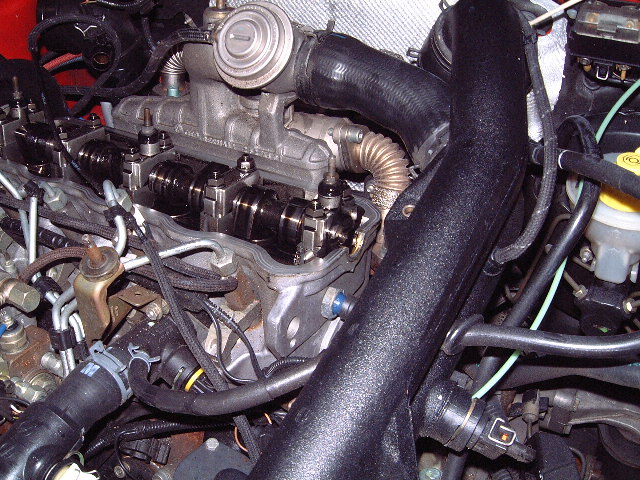
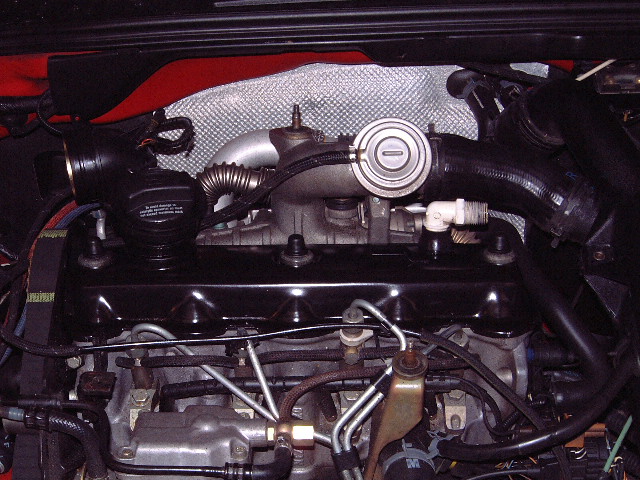
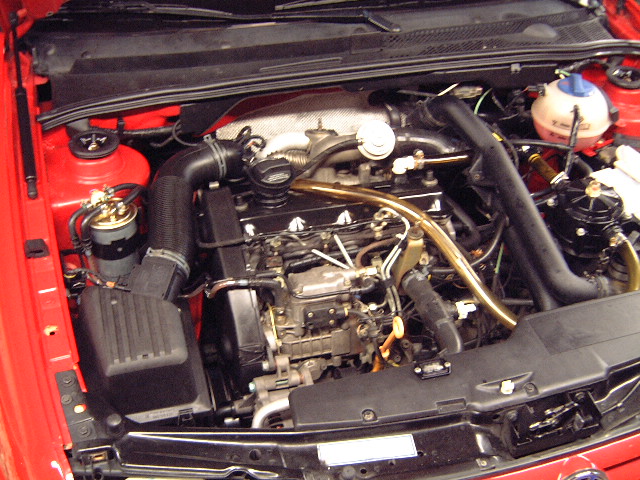
This is a picture of the engine with the cover removed

Remove the intake hose going to the air box then,
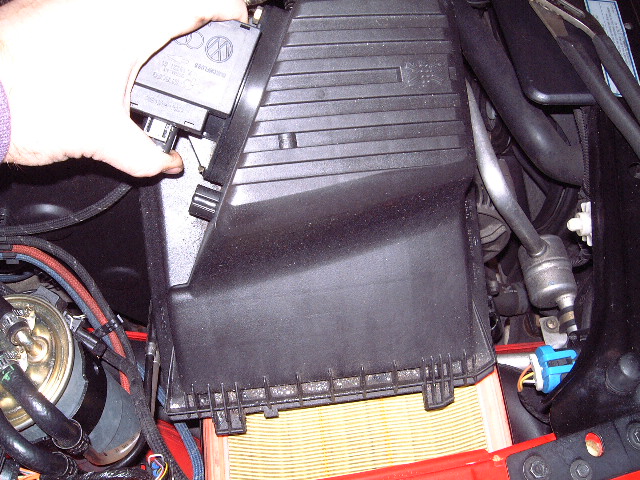
remove the air box cover and MAF sensor and set to the side where it won't get stepped on!
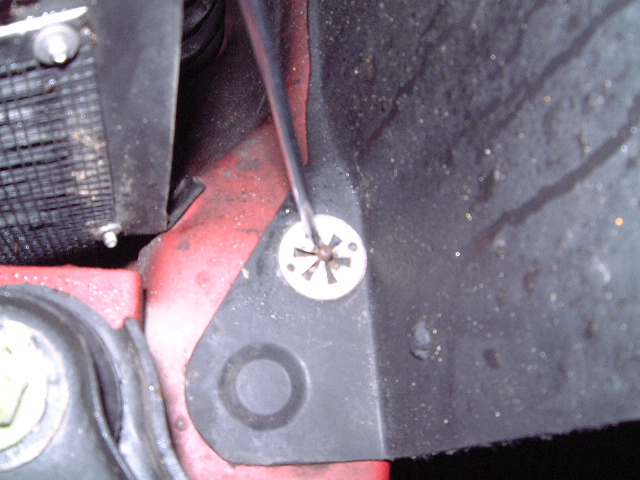
Next place the car on jack stands and remove the belly pan, a trick I have found to make removing the special washer things is to use a long small tipped screwdriver and unscrew them as depicted in the photo.
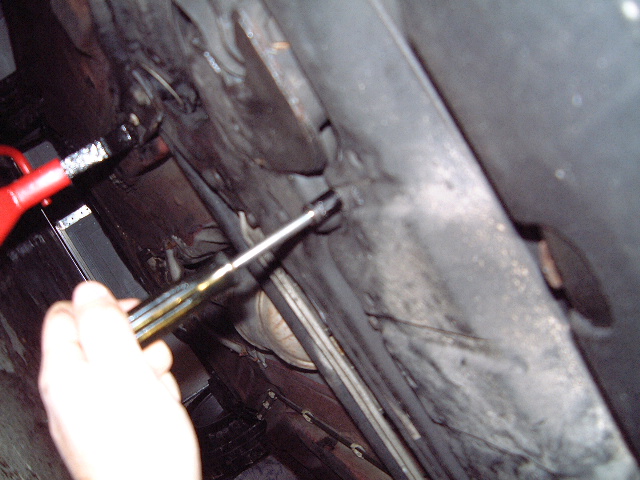
Next using a 10mm socket remove the four bolts that hold the rear portion of the belly pan on, lower the aft portion and slide the four front tabs from the underframe and take the belly pan out from under the car.
remove the timing belt cover,
remove the (3) plastic thread protectors,
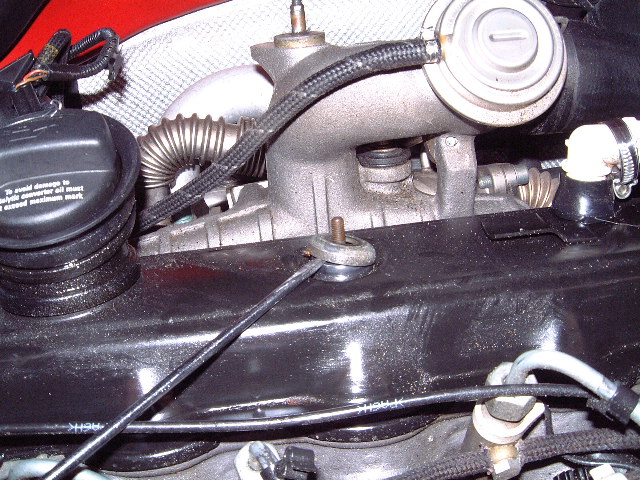
remove the (3) 10mm nuts and pry the (3) metal rings off the valve cover so you don't lose them when you pry off the valve cover in the next step,
GENTLY! pry the valve cover off be careful not to damage the injector lines (the screwdriver was resting on the line for demonstration purposes only),
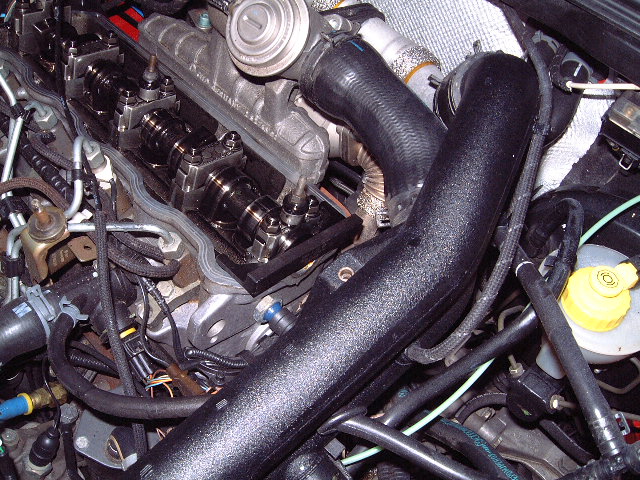
here is a picture of the valve cover gasket, it is ok to reuse it so be careful not to damage it.
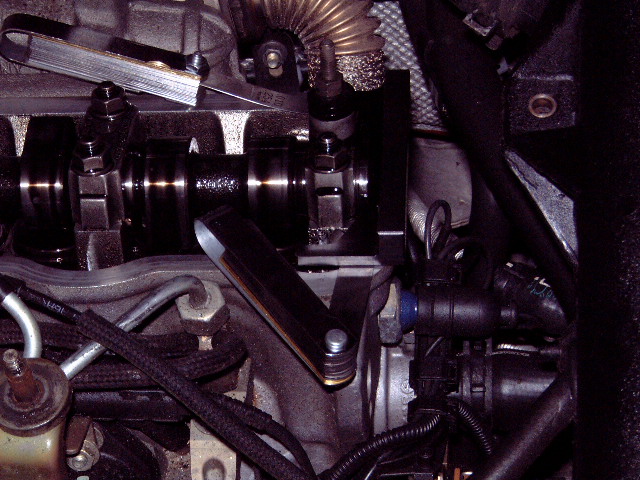
using the VW special tool or a 19mm socket and breaker bar turn the camshaft clockwise ONLY until...
...the camshaft's alignment slot is horizontal ({right side of camshaft by the half moon indent in the head}Note: that the slot is ground off centered and the slot should be flush with the deck of the valve cover deck and...
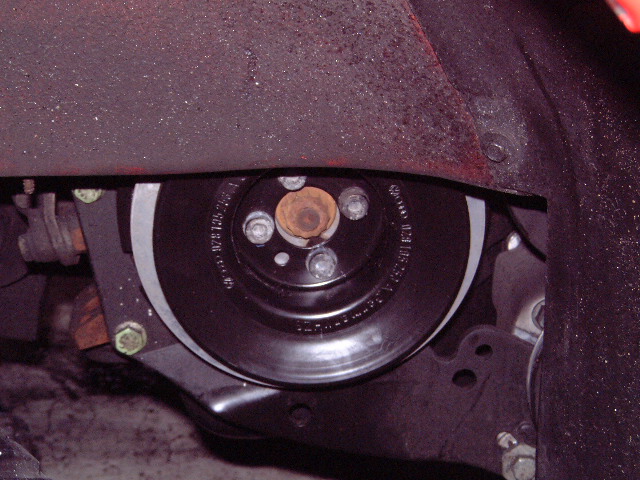
Locate the plastic TDC cover and remove. Under here is where you will be able to see the flywheel TDC mark. See the next picture to see the mark

... the Flywheel TDC mark lines up with the little aluminum arrow on the bell housing.
Now insert the camshaft locking bar and...
...the injection pump lock pin. By doing this the lock bar and injection pump pin will hold the engine from turning for one of the upcoming steps.

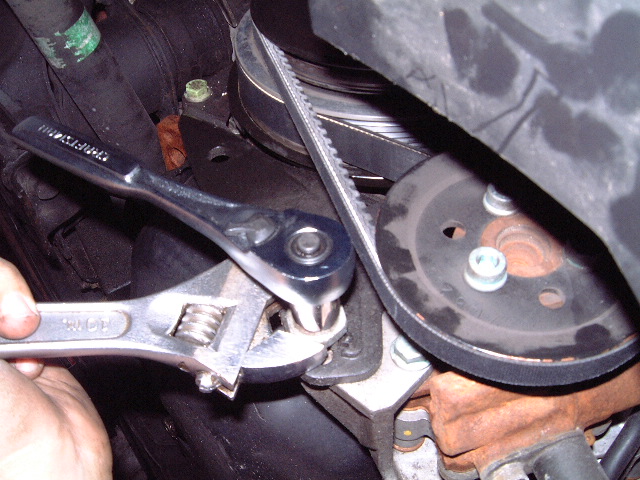
Now get a 13mm socket and go under the car and loosen the power steering pump bolt until it is just loose (DO NOT remove the bolt just loose
enough that you will be able to turn the geared nut with a crescent wrench) and...
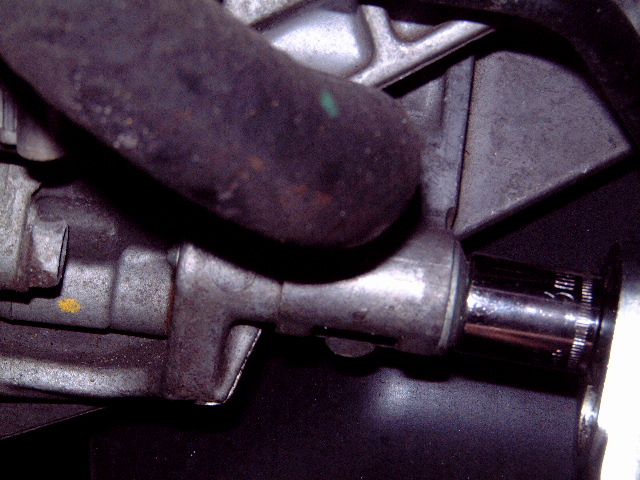
loosen the other bolt on the other side of the pump. Don't worry you will not be able to move the pump by hand what you will do is...
get a crescent wrench and turn the geared nut until the belt is loose enough...
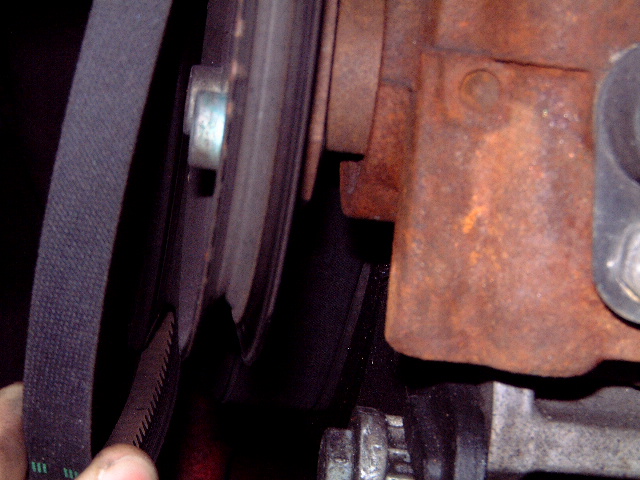
to remove without any struggle, then turn the nut back a turn or two this will allow enough room between pulleys so that you can slide the serpentine belt between them when you remove it.
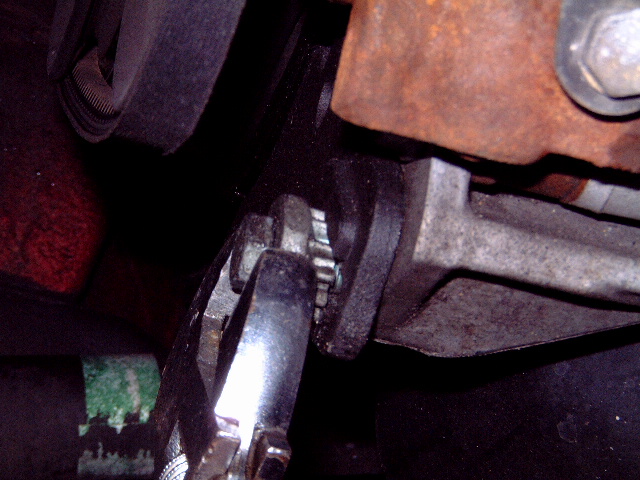
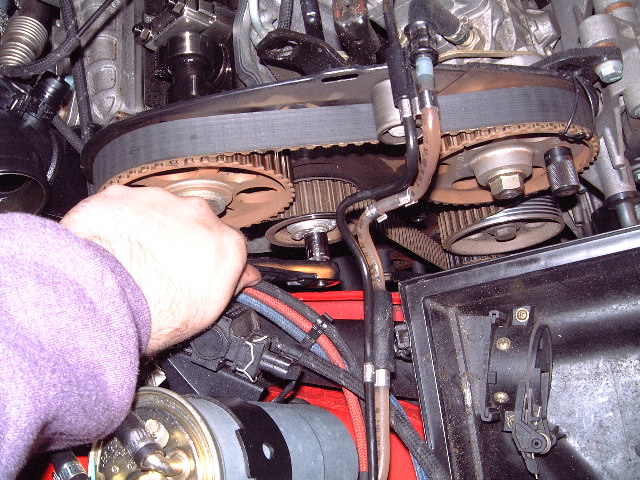
next get a big screwdriver and insert it into the tensioner as shown, gently pry the tensioner away from the belt (up) until...
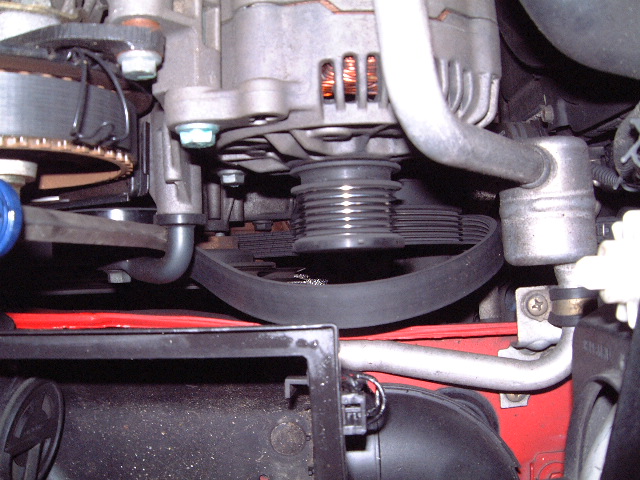
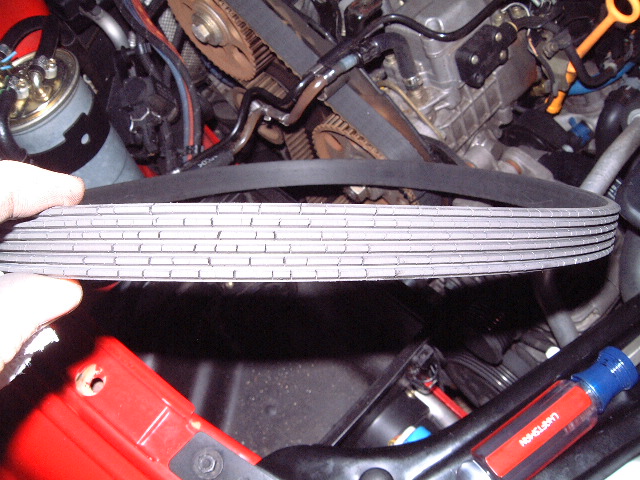
you have removed enough tension to remove the belt. I suggest replacing the belt and found mine to be shot after 60,000 miles (see picture link below to see all the cracks in the belt!, Don't do crack! change your belt! ).
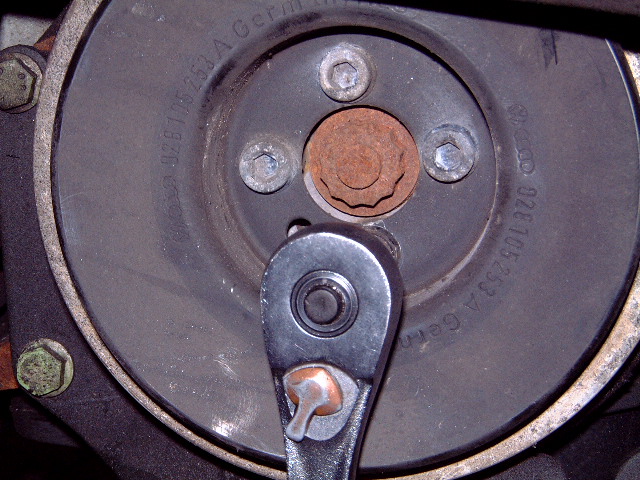
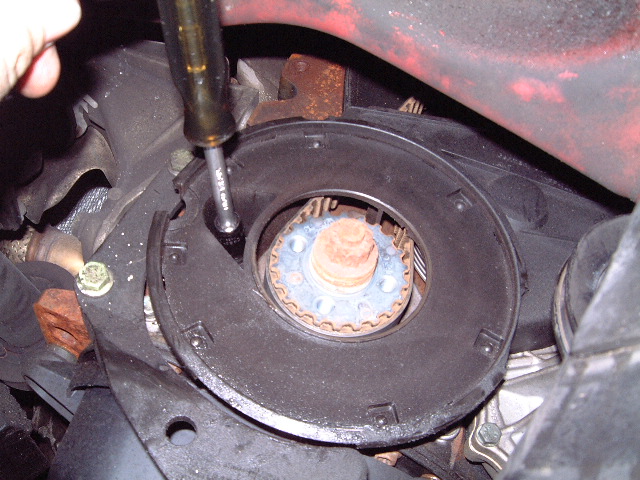
Get out your allen socket (highly recomended) and DO NOT USE AN EXTENSION or you WILL strip out the allen socket! Remove all four and under no circumstance loosen or use the center nut to hold the crank. The camshaft locking bar and injection pump pin will do that for you. You don't have to worry about damaging the lock bar or pin because the balancer bolts do not have enough of a mechanical advantage on the crankshaft to turn the cam while it is locked down.
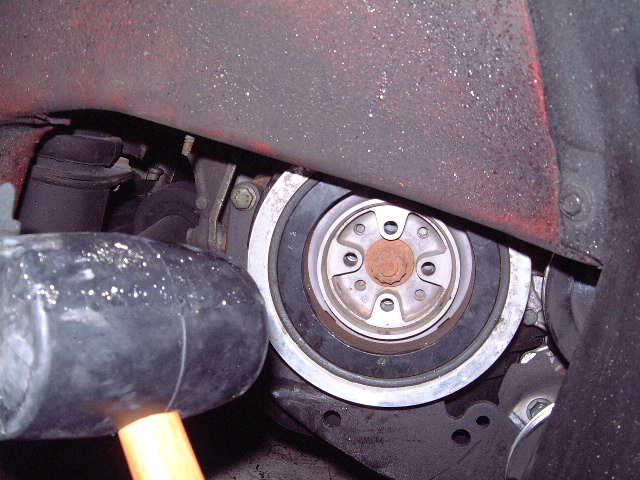
Remove the outer pulley (should be easy) and tap on the harmonic balancer with an Sledge hammer (I'M JOKING! ) use a rubber mallet and tap on it. A bit of rust and corrosion build up on the shaft and make it difficult to remove. Tapping on it (probably a lot) will loosen it up and make the struggle a bit less painful.
Get some green Scotch Brite and clean up the crank shaft and balancer from the corrosion (do not use steel wool, it's very bad when Steel wool is used on aluminum). Next get a 10mm socket and remove the two bolts and one very difficult to reach nut.
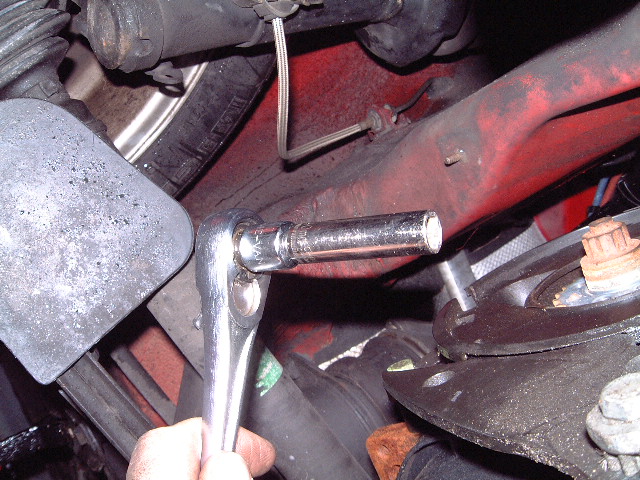
This is how you reach the 10mm nut to remove the plastic lower cover- one 3/8" to 1/4" reducer and a 10mm deep socket and a 3/8"
ratchet. The bolt that the nut screws onto has a blind head on it so it will not fall into oblivion. If you look up into the motor you can see where you can stick a screwdriver behind it to push it back in for reassembly.
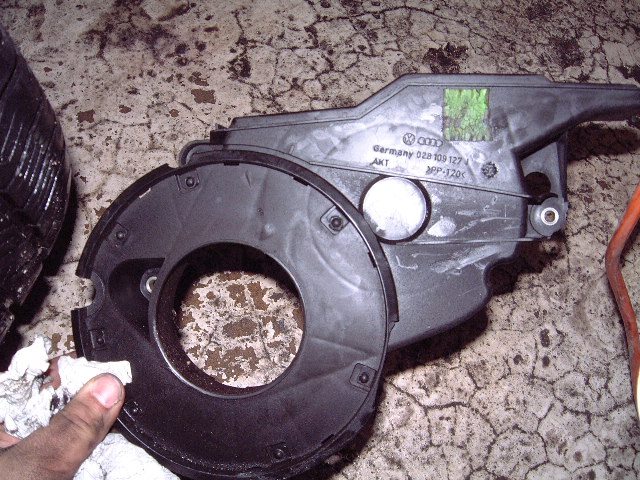
Here is a picture of the lower cover, Note where the hole is for the 10mm nut (not where my finger is but at the 2 o'clock position on the panel).
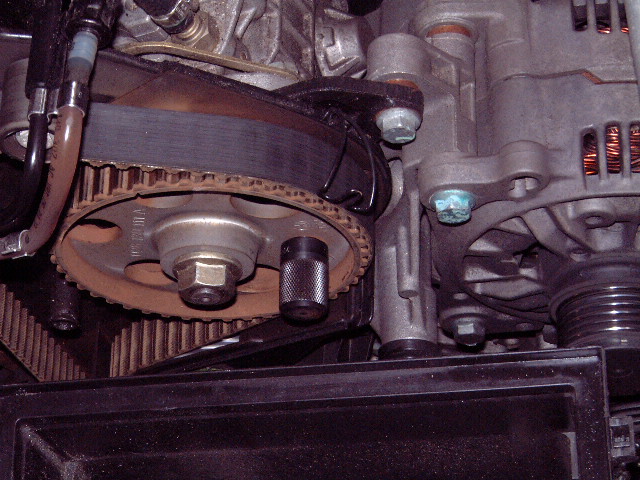
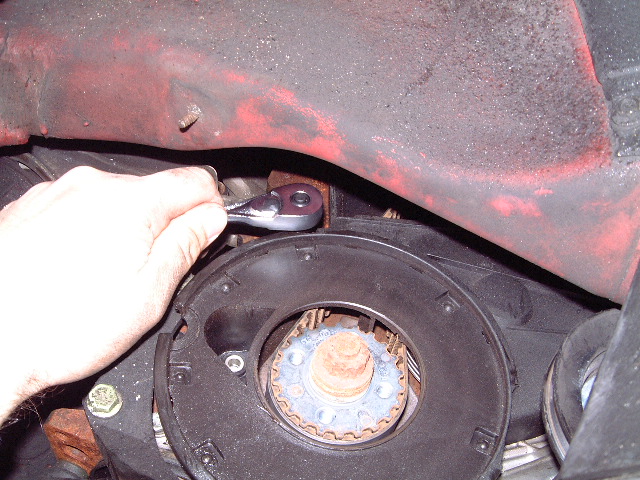
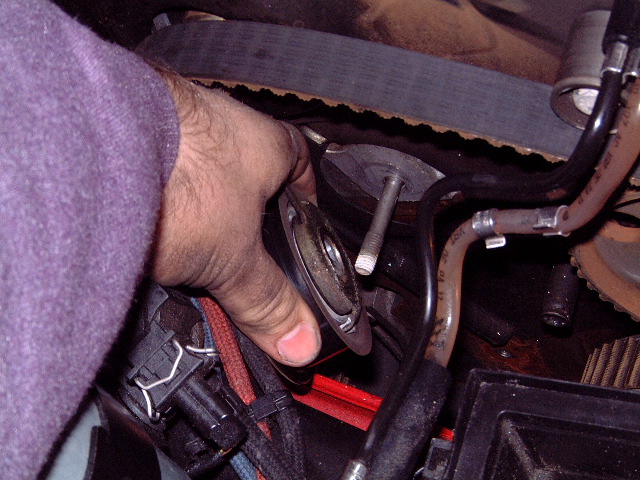
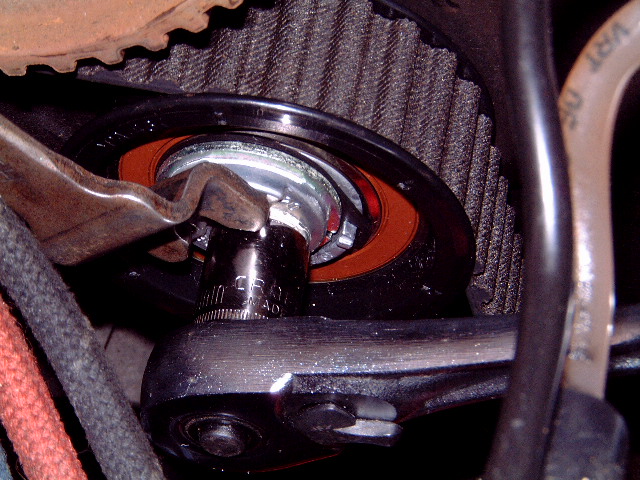
Here is where it gets fun loosen up the tensioner using a 13mm socket, Do not remove the tensioner yet!
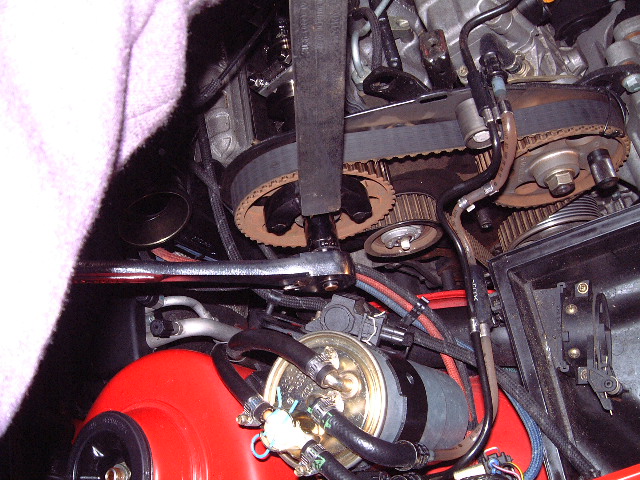
Now using the holding bar loosen the 19mm bolt on the camshaft. You should not rely on the camshaft lock bar to hold back the forces when trying to loosen this bolt it can deform the lock bar or crack the camshaft
Once you loosen the bolt only remove it about this far. This will keep the pulley from flying off the shaft in the next step
Using a punch and a hammer hit the inner diameter of the pulley. This will unseat it off the camshaft. The bolt will keep the pulley from flying off and possibly breaking something or itself. Don't worry as long as you hit the pulley near the center as shown you cannot break anything. It will take a pretty good hit to knock it loose so don't worry if it takes a couple of blows till you get it right. If you have a special puller (prefered method) you can use that as well but the punch method is what VW uses in the manual so you will be ok.
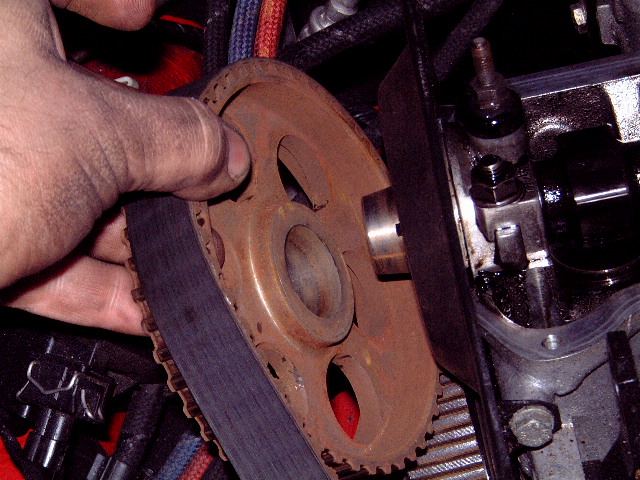
remove the pulley and the...
...tensioner and remove the belt from the engine. I replaced the pulley reason is I have seen one bad pulley out of 5 so far. The pulley had 90,000 miles on it but it would have lasted till the next belt change at 120,000.

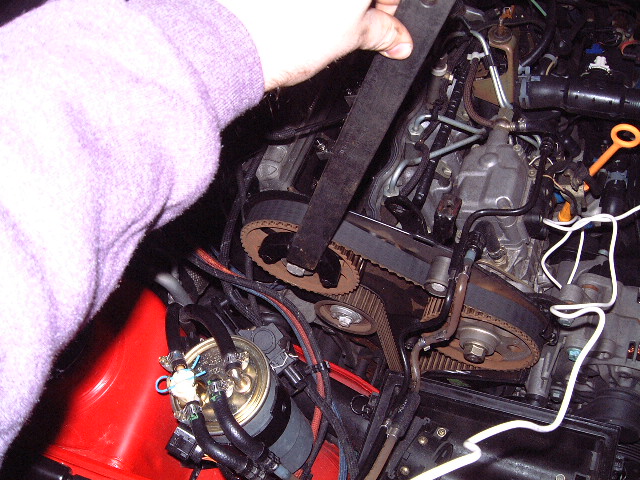
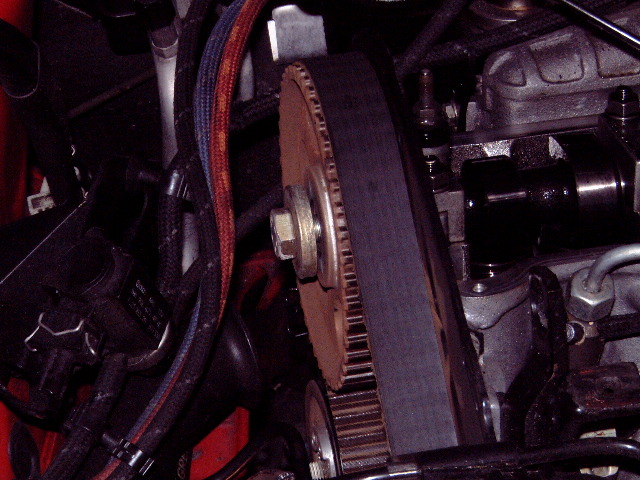
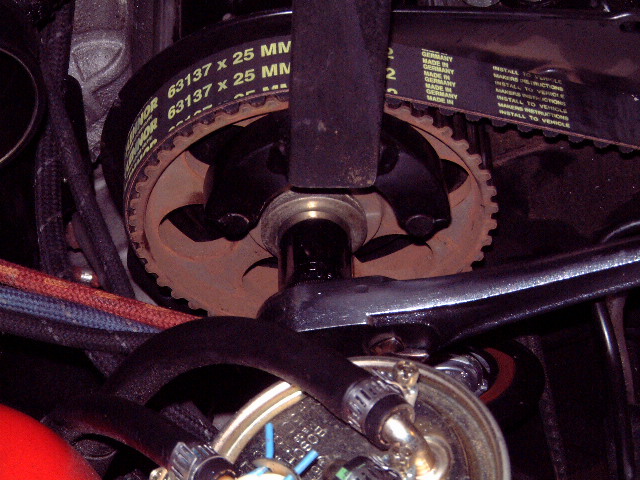
Insert the new belt and...
tensioner. I have found that wrapping the belt starting from the crank working counter clockwise around the intermediate shaft and then around the injection pump works best at removing excess slack from the belt.
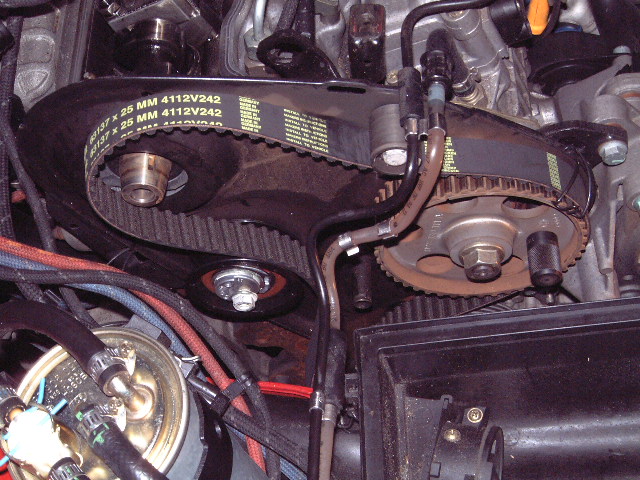
Once all the slack is taken up insert the cam pulley and the bolt but DO NOT TIGHTEN!

check that the engine is still at TDC. If its not just remove the pulley enough that you can move the crank one way or the other until everything lines up. I usually have to do this at least once on every timing belt. What I do is turn the crank by using a screwdriver by pushing the teeth on the flywheel in the direction needed. The belt will usually skip a tooth putting the crank in the correct set of teeth on the belt. The cam and injection pump are locked so you don't have to worry about them moving. I have used a screwdriver to help hold the flywheel by jamming it in the TDC hole (crude but it works).
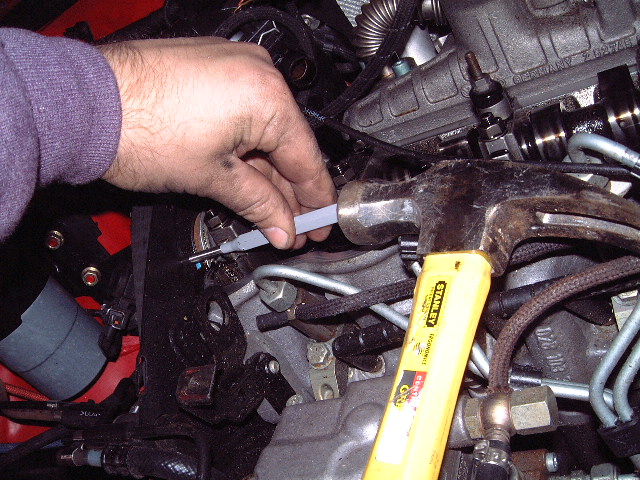
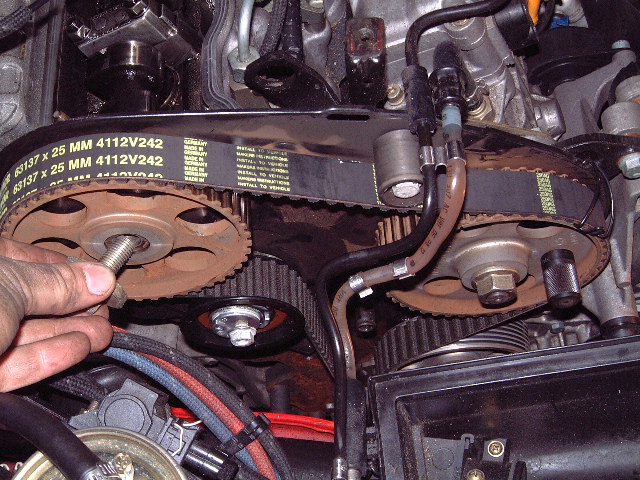
Now get out your two feeler gauges and start with a .010" feeler insert one on each side +/- a few .001" to make sure the camshaft is perfectly flat with the head. This is critical to make sure the cam is exactly where it needs to be relative to the crank.
Using the tensioner setting bar tool gently tighten the 13mm nut till it is just snug, then rotate the tensioner until the two marks line up and then tighten the nut down.
Once you make sure the engine is at TDC, the camshaft is set, and the injection pump lock pin is in place, now tighten the cam pulley. again make sure that you hold the pulley with something so you don't put too much stress on the cam lock tool or the brand new timing belt.
after removing the cam lock tool and the injection pump lock pin turn the camshaft one complete revolution. You will feel resistance against the cylinders compression so it will take a good amount of effort. This serves two purposes, one it makes sure that the timing on the cam and crank are correct, second it allows the timing belt to center itself on the pulleys. Once you go through a complete revolution and you did not feel the engine hit anything (you shouldn't) then get in the car and bump the motor a couple of times. All you are looking for is a quick bump Do not start the engine yet. NOTE: What you need to do is put the air box and intake tube back on the inlet and reconnect the MAF sensor wire, if you don't it will throw a code! the engine will run fine but the code will be stored regardless until you can clear it. After a couple of bumps go ahead and start the engine but only let it run for a second or two. It should start on the first try. If you let it run for more than a second oil will go everywhere!
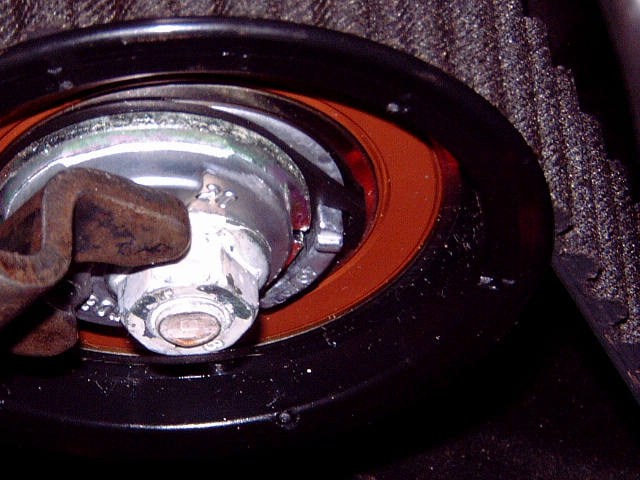
Reinstall the lower plastic cover (have fun putting the 10mm nut on ) and inspect that there are no oil leaks around the crank seal. If everything is satisfactory reistall the harmonic dampener, NOTE: the Dampener mus align itself with the holes, they are offset and can only go on one way. There is a notch 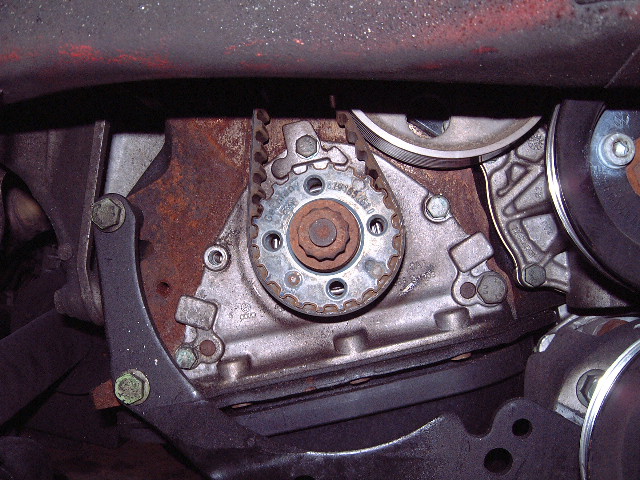 located at the 7 o'clock position that goes through one of the holes in the dampener. It's easy to do just look through the dampener holes and make sure you can see all the threaded holes. I highly suggest using Blue Locktite when reinstalling these bolts.
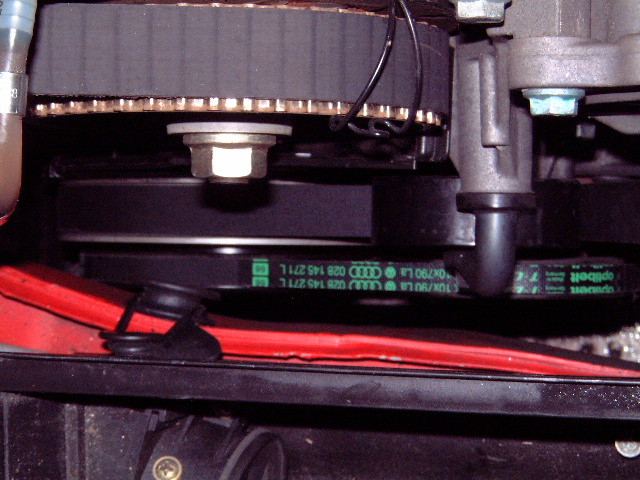
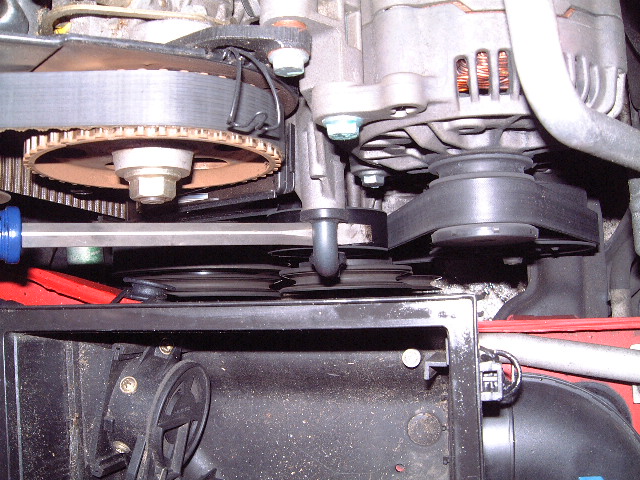
Reinstall the fan belts in the same order you took them off.
Re tighten the power steering pump belt, Do not over tighten and make sure there is a little play use your good judgement, if you over tighten this can wear out the water pump bearing and that is a pain to change!
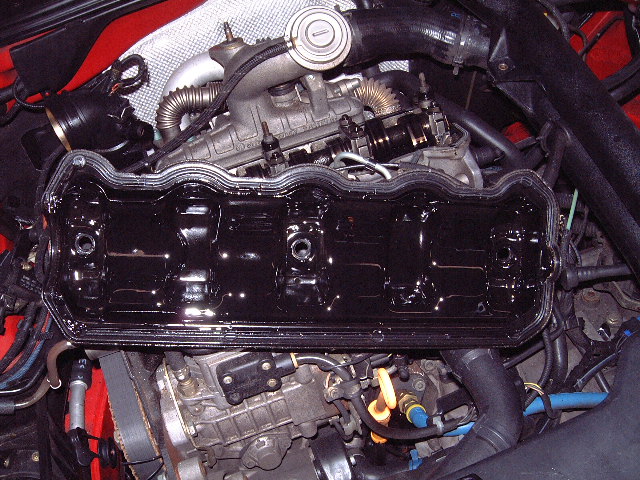
Clean off the valve cover deck with a paper towel and reistall the valve cover.
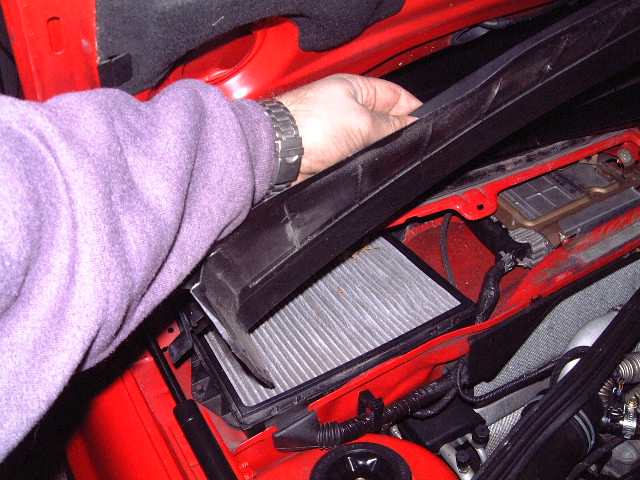
Here is a picture of my Pollen Air filter
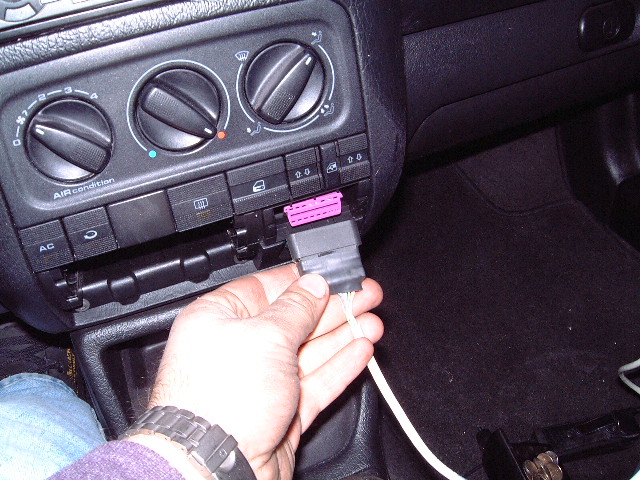
If you have a a cable and computer this is where you check the timing
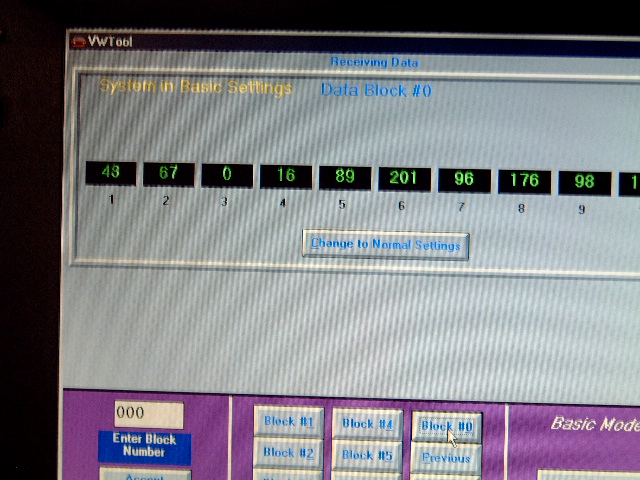
Start the car and run the software (in that order) click on Data Blocks, then click on the Basic Settings bar the screen will then display the data blocks in "Basic Settings" and look at Blocks 2 and 9 compare them with the Bentley manual graph. I lucked out the timing is where I prefer to have it set - Advanced. Anytime you are checking the timing the engine MUST be in Basic Settings. This removes all ECU timing corrections, you will hear the engine change pitch when this is selected.

Reinstall the timing belt cover
Reinstall the air box, and the other things you took off double check everything and your done.
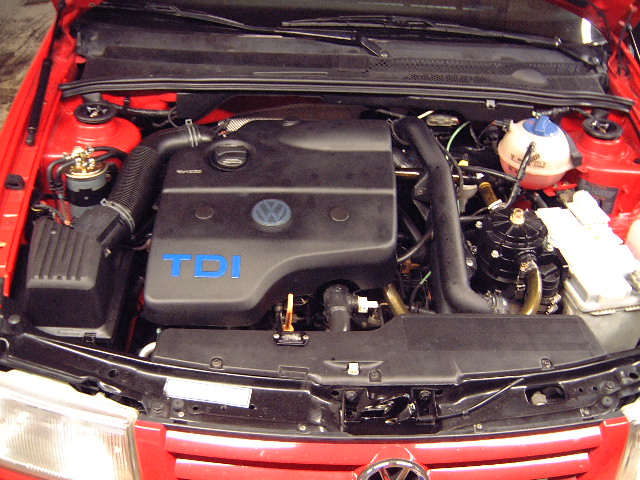
The finished product! I have found that after around 25,000 miles the timing needs to be checked again due to belt stretch. You will notice an increase in performance with a
noticeable increase in smoke output and lower mileage around this time. Most people attribute this to the engine "breaking in" it's actually the belt stretching from normal wear.
In another post I'll put together a pictorial on setting the injection timing.
Thanks to drivbiwire for the writeup and pictures.